- 18 Dec 2023
- 6 Minutes to read
- Print
- DarkLight
Integrating with Direct Checkout (DCv2)
- Updated on 18 Dec 2023
- 6 Minutes to read
- Print
- DarkLight
Overview
The integrator needs to include an Access PaySuite JavaScript library and components for the controls.
The JavaScript library contains the code for Direct Checkout, and you need to place components on your payment page where you want the controls to appear. These will then be populated with the appropriate fields when the payment page is loaded.
JavaScript library
The integrator needs to include the following JavaScript library in such a way that it is accessible to the payment page.
The payment page must serve the JavaScript from the Access PaySuite servers and not embed them locally on your domain.
Sandbox | |
Production |
Embed Direct Checkout
This section will describe the integration required to embed Direct Checkout into your payment page. This involves adding placeholders onto a page where you will direct the payer to capture the secure payment:
Initialise Direct Checkout
Payment page components.
Initialise Direct Checkout
Initialise the Direct Checkout library within the <script> tag of your payment page.
<script>
let config;
config.callbackResponse =callbackResponse;
var pay360Payment = new Pay360DC(config);
</script>
Config object
The config object is required to:
Provide parameters to the library
Customise the look and feel of the Direct Checkout UI (optional)
Handle the Direct Checkout response.
The attributes available in the config object are described below. Parameters are mandatory unless otherwise stated in Description.
Attribute | Description | Source |
|---|---|---|
publishableId | A public key used to secure card data on the Access PaySuite payment platform. | EPS Payment Account response: |
isvId | ID for the integrator, used during payment processing Data type: Integer | Refer to Prerequisites - Credentials section |
payment.amount | The payment amount to be provided to Apple Pay for processing | Specified by integrator |
transactionType | 'payment' (case sensitive) | Specified by integrator |
transactionId | ID for a transaction Data type: Integer | Payment intent response: |
sessionId | ID of a transaction session | Payment intent response: |
callbackResponse | Refer to Processing a payment with Direct Checkout - Handle payment processing response section | Specified by integrator |
styles | Provides the integrator the ability to customise styles Refer to Styling Optional | Specified by integrator |
localisations | Provides the integrator the ability to customise text Refer to Localisation Optional | Specified by integrator |
defaultFocus | Sets the default browser focus on a component when the page is loaded Should be set to “pay360-cardholder-data” Optional | Specified by integrator |
cardholderName | Sets a default value for the Cardholder name input control | Specified by integrator |
merchantCountryCode | The merchant's two-letter ISO 3166 country code and the default value is GB | Specified by integrator |
applepayCaptureBillingAddress | Specifies whether the billing address may be captured via Apple Pay.
Default value is false. Refer to the Apple Pay Billing Address section below. | Specified by integrator |
Important Note:
If you are currently using Direct Checkout v1 then you need to modify your existing initialisation from the v1 call Pay360Library(isvId, transactionType, transactionId, sessionId, config, provider) to the v2 call Pay360DC (config).
You need to provide isvId, transactionType, transactionId and sessionId under config.publishableId, config.isvId, config.transactionType, config.transactionId and config.sessionId respectively.
An example of setting all the attributes in the config object is below.
  <script>
  let config;
  config = {
  	publishableId:  publishableId
	isvId:  isvId
	transactionType:  "payment"
	transactionId:  transactionId
	sessionId:  sessionId
	callbackResponse:  callbackResponse,
  	  	styles:  {
  		//  See Styles section
  	},
  	localisations:  {
  		//  See Localisations section
  	},
	defaultFocus:  "pay360-cardholder-data",
  	cardholderName:  "The cardholder",
	payment: {
        	amount: 720.85
    	},
    	merchantCountryCode: "GB",
  }
</script>
Callback function
The “callbackResponse” is a reference to a function that must be written to handle the response from Direct Checkout.
Refer to Processing a payment with Direct Checkout - Handle payment processing response section.
  function callbackResponse(status, type,  response) {
  //  Handle payment processing response
  }
Apple Pay billing address
The "applepayCaptureBillingAddress" attribute enables the capture of a billing address via Apple Pay. This is a conditional attribute based on your requirements.
If your integration is not supplying billing details in the payment intent,
and “applepayCaptureBillingAddress” is set to true, a billing address may be captured by Apple Pay.
and “applepayCaptureBillingAddress” is set to false, no billing address will be captured.
If your integration is supplying billing details in the payment intent,
and “applepayCaptureBillingAddress” is set to true, any billing address captured by Apple Pay will overwrite the data from the payment intent.
and “applepayCaptureBillingAddress” is set to false, the billing address from the payment intent will be used.
We will require a billing email to provide an Access PaySuite email receipt, which may only be sent in the payment intent.
Payment page components
Apple Pay button
The Apple Pay button enables your payment page to display the payment method for selection. You should check whether Apple Pay is supported by the device before displaying the button.
To display the Apple Pay button, after checking whether the method is supported, add the following HTML to the body of your payment page:
if (window.applePaySession)
  {
     //<div id="pay360-apple-pay-button"></div>
   }
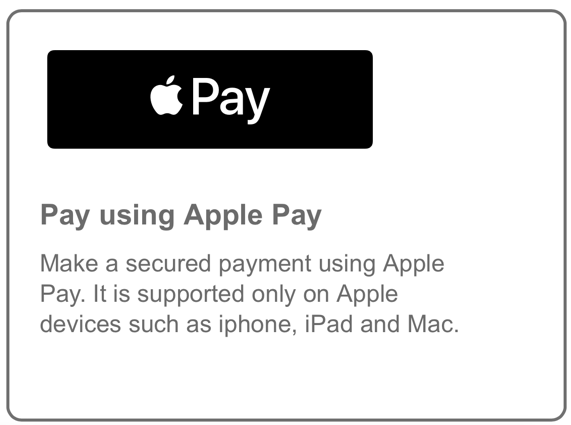
When your payment page is loaded with Direct Checkout integrated, and the device supports Apple Pay, the Apple Pay button will be displayed:
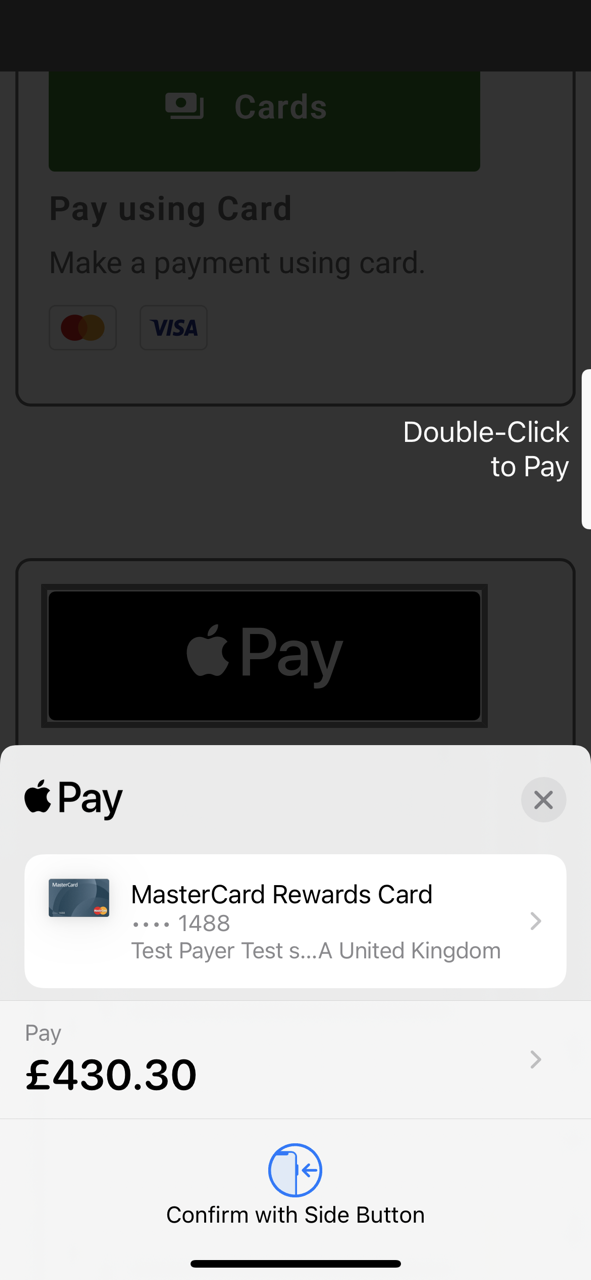
Once the payer clicks on the button, an Apple Pay payment sheet will be displayed:

Card details component
The card payment component enables your payment page to embed a group of controls that enables the capture of card payment data.
To embed a card payment component, add the following HTML onto the body of your payment page.
<div id="pay360-cardholder-data"></div> When your payment page is loaded with Direct Checkout integrated, this component will display a group of secure card input controls.
Cardholder details component (optional)
The cardholder details component enables your payment page to embed a group of controls that enables the capture cardholder details.
This is a conditional component based on your requirements.
If your integration is not supplying billing details in the payment intent, then this component is required since some of the address fields are currently mandatory to perform 3D Secure authentication. Please note that the mandatory fields may change in future, in line with card scheme and card issuer requirements
If your integration is supplying billing details in the payment intent, then this component is optional. If embedded and values are supplied, then they will overwrite the data from the payment intent.
We will require a billing email to provide an Access PaySuite email receipt, which can be sent in the payment intent, or collected/amended via this component.
There are various ways to embed the cardholder details component.
Display a checkbox to expand and show the billing address and email components
<div  id="pay360-billingAddress-checkbox"></div>
    <div  id="pay360-billingAddress-container">
    <div  id="pay360-billingAddress-title"></div>
    <div  id="pay360-billingAddress-line1"></div>
    <div  id="pay360-billingAddress-line2"></div>
    <div  id="pay360-billingAddress-line3"></div>
    <div  id="pay360-billingAddress-line4"></div>
    <div  id="pay360-billingAddress-city"></div>
    <div  id="pay360-billingAddress-county"></div>
    <div  id="pay360-billingAddress-country"></div>
    <div  id="pay360-billingAddress-postcode"></div>
    <div  id="pay360-billingEmail"></div>
    </div>
Always display the mandatory billing address components
<div  id="pay360-billingAddress-line1"></div>
    <div  id="pay360-billingAddress-line2"></div>
    <div  id="pay360-billingAddress-city"></div>
    <div  id="pay360-billingAddress-county"></div>
    <div  id="pay360-billingAddress-country"></div>
    <div id="pay360-billingAddress-postcode"></div>
    <div  id="pay360-billingEmail"></div>
Always display all billing address components (mandatory and optional)
<div  id="pay360-billingAddress-line1"></div>
    <div  id="pay360-billingAddress-line2"></div>
    <div id="pay360-billingAddress-line3"></div>
    <div  id="pay360-billingAddress-line4"></div>
    <div  id="pay360-billingAddress-city"></div>
    <div  id="pay360-billingAddress-county"></div>
    <div  id="pay360-billingAddress-country"></div>
    <div  id="pay360-billingAddress-postcode"></div>
    <div  id="pay360-billingEmail"></div>
When your payment page is loaded with Direct Checkout having been integrated, this component will display a group of billing address input controls. An example of the output is below.
Card submit component
The submit component will enable you to post data collected from the secure payment controls and submit the data to the Evolve Payment Service. This is only required for card payment.
To embed a submit component, add the following HTML onto the body of your payment page.
<div id="pay360-submit"></div> Error components
The error component enables your payment page to embed an error message that is returned from Direct Checkout.
To embed an error component, add the following HTML onto the body of your payment page.
Apple Pay
<div id="pay360-apple-pay-errors"></div>Card payment
<div id="pay360-errors"></div> Completed integration payment page
Your completed integration payment page should look something like the following document.
<html lang="en">
	<head>
		<meta charset="utf-8">
		<script>
			let config;
			config.callbackResponse = callbackResponse;
			new Pay360DC(config);
		</script>
	</head>
	<body>
		if (window.applePaySession)
		{
		// <div id="pay360-apple-pay-errors"></div>
		<div id="pay360-apple-pay-button"></div>
		}
		<div id="pay360-errors"></div>
		<div id="pay360-cardholder-data"></div>
		<div id="pay360-billingAddress-checkbox"></div>
		<div id="pay360-billingAddress-container">
			<div id="pay360-billingAddress-title"></div>
			<div id="pay360-billingAddress-line1"></div>
			<div id="pay360-billingAddress-line2"></div>
			<div id="pay360-billingAddress-line3"></div>
			<div id="pay360-billingAddress-line4"></div>
			<div id="pay360-billingAddress-city"></div>
			<div id="pay360-billingAddress-county"></div>
			<div id="pay360-billingAddress-country"></div>
			<div id="pay360-billingAddress-postcode"></div>
			<div id="pay360-billingEmail"></div>
		</div>
		<div id="pay360-submit"></div>
	<body>
<html>
Browser navigation
Direct Checkout implicitly handles rendering the:
Apple Pay payment sheets
3D Secure challenge page by displaying it within an iframe.
Any other page navigation that is outside of the control of the Access PaySuite library should be controlled by the integrator. This includes browser button navigation (back and forward) and other hyperlinks or buttons on the payment page if any. If the customer navigates to any other page, then they will be navigated back to the payment page with a new payment session. Any previous payment data will be lost.

